promo naija

Monday 21 October 2013

BEST PHONES IN THE WORLD TODAY

 1 : HTC ONE
                           HTC One

Don't fear HTC fans - your darling is still number one. As our only five star phone, its combination of impressive UI and stunning aluminium build means it was always safe in the number one
It's nothing to do with the quality of the S4 or the LG G2 – outstanding phones in anyone's book – but more the fact HTC has managed to bring out a smartphone that's worthy of any user's consideration.
The supreme aluminium chassis, the Full HD screen and the simplified version of Sense 5.0 sitting on top of Android Jelly Bean means it's a pleasure to use and recommend this handset.
The new innovations are also pleasingly more than just marketing gimmicks; Zoe functionality allows the creation of delightful video highlight reels, and the Ultrapixel camera means you've got a much wider range of shots available thanks to being stunning in low light.

CLICK HERE TO VIEW HTC ONE REVIEW
CLICK HERE TO VIEW HTC ONE SPECIFICATION

NUMBER 2  LG G2

                             LG G2

Wait, an LG phone in at number two? Believe it people; LG has made a phone that not only impressed us but ran the HTC One very, very close for the top spot.
We don't know where to start in terms of extolling the virtues of this new handset from the South Korean firm: it's got an insanely good screen, quality camera, the best audio pumping out from its speakers and headphone jack... the list goes on.
We even came to tolerate, then love, the power and volume buttons being placed on the rear. These aren't ideal, but the ability to knock on the screen makes it really easy to interact with this impressive device.
CLICK TO VIEW LG G2 REVIEW
CLICK TO VIEW LG G2 SPECIFICATION

 3 SAMSUNG GALAXY S4
                          Samsung Galaxy S4

All change at the top! Samsung managed to hold off HTC at the top in 2012, but this year the supreme stylings of the HTC One proved too strong against a phone that's a slightly-better-version of its predecessor.
Well, that's not really fair - it's only in looks that it's too similar, and sadly that was one of the biggest issues most users had with the S3. It's not the world's biggest smartphone crime, but it's enough to keep it from the top spot.
There's a lot, a lot, to love with the Samsung Galaxy S4 though: whether it's a powerful camera, a brilliant screen, a long-lasting battery or just a fluid experience, there's everything you could want in a smartphone right here.
The cost is a tad higher than on other smartphones, but thankfully still cheaper than iPhone level. If only it was made out of something a little more premium...
LG has now taken its second spot too - here's hoping the Samsung Galaxy S5 brings something that's really rather special to halt its slide down the charts
CLICK TO VIEW SAMSUNG GALAXY S4 REVIEW
CLICK TO VIEW SAMSUNG GALAXY S4 19500 SPECIFICATION
CLICK TO VIEW SAMSUNG GALAXY S4 i9505 SPECIFICATION
CLICK TO VIEW SAMSUNG GALAXY S4 i9502 SPECIFICATION

4 IPHONE 5S

                           
Did you see this one coming? The iPhone 5S behind three other Android phones in our rankings? Some think it should be higher, some think lower - it depends on your level of Apple love.
Never has a company polarised opinion in the smartphone world like Apple - and with the iPhone 5S, so many are quick to decry it while others know it to be the smartphone they've been waiting for.
And let's make no bones about it: this is a stunning phone, with a gorgeous two-tone finish, a high-res screen with good colour reproduction, a 64-bit chip and that all-powerful TouchID sensor that lets you unlock your phone with a simple fingerprint.
The iOS 7 update is one that we sorely, sorely needed and does bring a lot more power and control - as shown by the impressive and pervasive Control Center.
We really like TouchID, the processor might be a little useless now but definitely brings a touch more zip to things, and the M7 chip for fitness apps will be very exciting in weeks and months to come as app developers get their paws on it.

The main problem we have with this phone, spec list aside, is the fact the iPhone 5S is STILL very expensive... we're not sure how such sky high prices can be charged when equivalent smartphones are available on the market.
CLICK TO VIEW IPHONE 5S REVIEW
CLICK TO VIEW IPHONE 5S SPECIFICATION

5 HTC ONE MINI
                              HTC One Mini

If you hold both the One and the One Mini, you'll struggle to tell the difference, apart from the fact one is smaller than the other (obviously). The aluminium build quality pervades, and it's hard to believe that you're not holding one of the premium devices on the market.
Even the polycarbonate band that runs around the edge of the phone is unobtrusive, which means you get a distinctive design that doesn't impact on the way the One Mini sits in the hand.
We love that the functionality of the One Mini isn't compromised from its larger relative, with the likes of UltraPixels and BoomSound all involved without being watered down. HTC has been very clever in the design of this phone by bringing nearly every great element of the One to the smaller version, and packaging it in a way that still makes it very attractive.
In short, it's a cheaper version of the larger phone that scales down the processor and drops the price. Good combo, HTC.
CLICK TO VIEW HTC ONE MINI REVIEW
CLICK TO VIEW HTC ONE MINI SPECIFICATION

6 SAMSUNG GALAXY NOTE S3

                                 Galaxy Note 3

The Samsung Galaxy Note 3 is alive and kicking and breathes yet more life into a mobile form factor many thought would be dead on arrival, ramping up the specs and the size to give us a new monolith of mobile.
It may be big, but the 5.7-inch display is fantastic and the Full HD Super AMOLED technology makes everything pop from websites to movies.
You're able to fit a lot more on screen at a time and that means less scrolling in messages, on websites and down your long contact list and that can only be a good thing.
What really impressed us with the Galaxy Note 3 though was its battery life and sheer speed under the finger. We're used to a day at best when hardcore using the device, but we got far past that without breaking a sweat throughout our tests.
The speed of the Snapdragon 800 quad core processor, combined with 3GB of RAM, means this is the least-slouchy phone we've encountered in a while.
CLICK TO VIEW SAMSUNG GALAXY NOTE S3 REVIEW
CLICK TO VIEW SAMSUNG GALAXY NOTE S3 SPECIFICATION
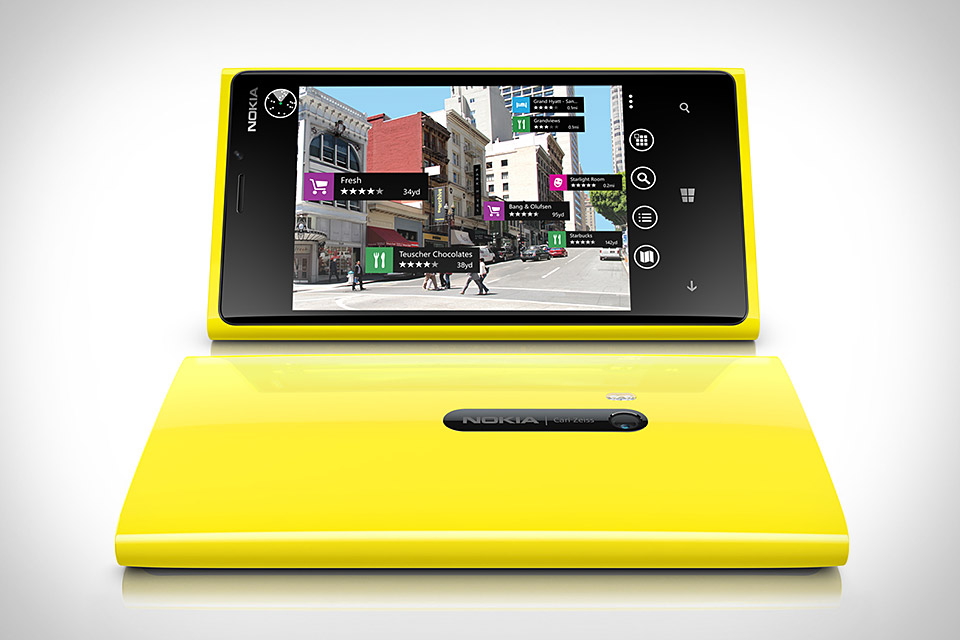
7 NOKIA LUMIA 520
                         Lumia 520

The Nokia Lumia 520, much like its big brother the Nokia Lumia 620, is a jack of all trades and a master of none - although it really manages to make a good fist of everything it tries, for the price.
It looks good, it's got a decent screen both in terms of size and resolution, it rarely stutters or slows down, it's great for calls and messaging, reasonable for media and okay for photos.
To achieve a lower price point the 520 has had to strip away a few things - there's no NFC, compass, camera flash or front facing camera here.
But on the other hand it's also got a bigger screen, a larger battery, a sleeker, slimmer, lighter build and the same processor and RAM as the Nokia Lumia 620, so in many ways it's actually better.
Combine that with a lower price tag and we reckon that this just might be the best entry level Windows Phone 8 handset that you can buy and certainly the best value.
CLICK TO VIEW LUMIA 520 REVIEW
CLICK TO VIEW NOKIA LUMIA 520 SPECIFICATION

8 SONY XPERIA Z1
                                 Sony Xperia Z1

The Sony Xperia Z1 is another powerhouse of a phone. With a 20.7MP camera with G Lens technology, the ability to withstand rain, snow and sand and a superfast Snapdragon 800 processor running the show, it's clearly a great handset to have around.
It also comes in a variety of funky colours, has a pleasing build quality that helps justify the higher price to a degree and basically offers the best of the Sony brand in a smartphone.
We do have a few reservations insofar as the Z1 doesn't really carry the mantle the Xperia Z created; it's got a massively uprated camera and screen technology, but neither particularly wow.
CLICK TO VIEW SONY XPERIA Z1 REVIEW
CLICK TO VIEW SONY XPERIA Z1 SPECIFICATION

9 SAMSUNG GALAXY S4 MINI
                         Samsung Galaxy S4 Mini


Samsung has created a mid-range handset, putting itself right against the 4G-toting Sony Xperia SP and Nokia Lumia 820 - but most importantly now in a war with the HTC One Mini too.
The Galaxy S4 Mini takes the design language of the full-fat S4, and does well to shrink it down without losing the same 'atmosphere'.
A vibrant screen, bright and clear enough, added to the fact it's only 4.3-inches large, mean the S4 Mini is a lot easier to hold in the hand, and the camera is as powerful as we'd expect on a phone of this size and price point.
REVIEW
SPECIFICATION

10 SAMSUNG GALAXY S3
                                     Galaxy S3
With the Samsung Galaxy S4 (and friends) now launched, the S3 has predictably fallen down the rankings thanks to there being a better phone to recommend.
But don't worry: the S3 is still a strong phone: it's got every kind of feature we could ask for and more, and raised the bar once again in terms of what consumers should be expecting in terms of battery life, processor speed and media management.
Would we recommend you buy one if you're hankering for a spot of Samsung? Yes, but only if you're trying to save money, as the S4 is a much better version of this phone indeed.
Price isn't the only reason the Samsung Galaxy S3 is worthy of consideration though. Smart Stay, Super AMOLED HD screen, up to 128GB storage, Music Hub, removable battery, quick camera; for the price, this phone still delivers in ways that many others on the market can't.
The design didn't impress us as much as when we first laid eyes on the S2, but that's the only big issue we could find - and it's proven popular enough for MILLIONS of you to have bought it thus far, showing that it's still a cutting edge smartphone for some.

It looks like Android 4.2 is being skipped for the all-singing 4.3 version (for Galaxy Gear smartwatch compatibility), there's still life in this once-leading phone - just make sure you check out the S4 or Note 3 first

REVIEW
SPECIFICATION

11 NOKIA LUMIA 925
                            Lumia 925
What's better than a top Windows Phone 7 handset? A Windows Phone 8 one, and we've got no qualms about telling you this is the best high-end Windows Phone out there.
Simplicity is the key here, the Lumia 925 does the basics well, from contact integration and calling, to web browsing and messaging. The camera is market-leading, and offers excellent performance from low-light to jumpy videos.
The 8.7MP PureView camera on the back of the Lumia 925 is actually one of the best we've used, and for anyone looking to get a top end cameraphone: you need to seriously consider this Nokia, although the recent glut of handsets (Sony Xperia Z1, HTC One, LG G2 and iPhone 5S) have all stepped up their game significantly to offer strong camera experiences too.
The 4.5-inch display is also a good'un, crisp and clear it makes watching movies, surfing the web or Facebook stalking an enjoyable experience, thanks to the PureMotion HD technology on offer.
And you can even use it with gloves on... what more could you want? You're right: hologram messages. But they don't exist yet.
REVIEW
SPECIFICATION


TIPS ABOUT YOUR NOKIA LUMIA 1020

                           
The new nokia lumia 41-megapixel camera proved too much to resist, then you’ll be on the lookout for some advice on getting the most from your new Windows Phone.

Camera tips

You’ll no doubt be planning to use the camera a lot. It’s worth checking out the Nokia Camera Grip accessory because it adds a classic camera grip, an attachment for a tripod, and an extra battery.

One weakness of the camera in the Lumia 1020 is the fact that it takes a couple of seconds to start up and there’s a pause between shots as it processes that massive 38-megapixel photo. It pays to be quick off the mark.

Hold the shutter button: To quickly switch your camera on when the phone is locked, press and hold the dedicated camera key on the right spine for a couple of seconds.
Camera sleep: To save battery, the camera will go to sleep if it isn’t used for a minute. Press the power button on the right spine and drag the lock screen up to bring it back to life.
Tap to focus: Tap on your subject to auto-focus, but bear in mind the auto-focus will struggle in low light conditions and usually takes a lot longer. You can always set the focus manually.
Swipe up to zoom: You can zoom in by swiping one finger up and zoom out by swiping down. This works for the video camera too.
Zooming is really just cropping: Remember that the digital zoom is non-destructive, so it’s effectively a cropped full 38-megapixel photo and you can return to the full version and crop or reframe it the way you want.
Go manual: Don’t rely on the automatic controls, they are generally good, but it’s worth experimenting with the white balance, ISO, and shutter speed.
Color balance: You can choose from various white balance presets to get the colors balanced correctly.
Mess with ISO: ISO settings will change the speed at which light is absorbed by the sensor, so higher ISO settings take in light faster, but increase noise and color inaccuracy.
Shutter: Fast shutter speeds are best for action shots in well-lit conditions.
Smart Camera App: Use Nokia Smart Camera to get a sequence of photos and combine them for the best shot. This is especially handy for group shots.
If you’d like to learn more about the camera and how it works then read Nokia’s whitepaper. It explains exactly how the technology employed by the Lumia 1020’s camera works.

Post-processing apps

Nokia has included a few apps on the Lumia 1020 to help you edit your photos, but there are several more in the Windows Phone app store that are worth getting. The first three on the list will be pre-installed on your 1020.

Creative Studio is your first port of call and it can be used to remove red-eye, tweak your photos, and apply various filters.
Glam Me Lens is good for a makeover, with options that include toning, eye resizing, and teeth whitening.
Cinemagraph is a fun way of making little animations. You can basically animate portions of a still image by combining shots.
Lomogram for a wide variety of filters, borders, and light effects that can be used to transform your photos.
Camera360 is very intuitive and offers a range of handy tools for photo editing. You can choose various unique themes and see a live preview of special effects.
How to use voice commands

Your Lumia 1020 can handle some voice commands allowing you to open apps or call contacts hands-free. To find out exactly what you can do, press and hold the Start key and then tap on the question mark and you’ll get a list. Scroll right to see any apps that support voice commands and right again to find more options.

How to get extra storage and backup

You get 7GB of free SkyDrive space in the cloud from Microsoft. You can set your app list and settings, text messages, and photos to automatically backup via Settings > backup. You can also upload individual photos or videos by tapping the options icon at the bottom right and choosing upload to SkyDrive. It won’t save or backup your full 34 or 38-megapixel shots, just the 5-megapixel versions.

How to add your own ringtones

You can add ringtones to your Lumia 1020 really easily. Choose your ringtone via Settings > ringtones+sounds. To add a new ringtone to the list just connect your phone to your computer via USB, open Windows Explorer and choose your Phone then drag and drop any audio file that you want to use into the Ringtones folder.

How to make the most of the new ‘Amber’ update

Nokia’s Lumia range got a Windows Phone 8 update called Amber which enables a few extra features. Here are three of the best.

You can flip your Lumia 1020 over to silence it when it’s ringing. Go to Settings > audio and swipe right to turn Flip to silence on or off.
You can double tap on the screen to wake the phone instead of using the power button. Go to Settings > display+touch and swipe right to find the Double tap to wake up phone option.
You can see the time on your display even when it’s on standby. Go to Settings > display+touch and swipe to Glance. You can choose to have it on all the time, to come on when you hover your hand over the screen, or to come on at specific times. There’s even a night mode which reduces the brightness, perfect if you use your Lumia 1020 as a bedside alarm clock.


HOW TO ACCESS INSTAGRAM ON PC


                        Instagram web profile(Following)

Instagram the famous app for picture lovers is really trending and most people feel is just for andriod users,well am going to be giving you few tips on how to access this app on your pc either by app installation or web access

Bluestacks
Install the Bluestacks software for your windows. After this download Instagram app for Android and double click the .apk file. This will auto install itself on Bluestacks.
                                 Tadaa! The Sign Up for Instagram.
Open Bluestack library and launch the Instagram app. Login using your Instagram user ID and password. If you don't have an account then you can sign up through Instagram app.
                                  Instagram on Bluestack.
Congratulations! You can now use Instagram on your PC

Note with these other methods you must signup on instagram with an andriod phone before u can access your account on net

2nd Method Instagram Website
here you can also access Instagram on your PC via web by visiting your Instagram web profile on Instagram web by writing the following address in your browser - www.instagram.com/username ,here replace "username" with your user name.
                         Private Instagram user on Instagram web profiles
If your profile is private then it will show that the account is private otherwise it will show your uploaded photos. Just log in with your Instagram account and explore.
                         Follow the user via Instagram web profiles
Congratulations! You can now browse your Instagram pictures and can even comment or delete comment on your Instagram photos. This how a web Instagram profile looks like while being public or when you follow a private user

3rd Method ...Instagrille
click on this link to download instragrille installer

                      Installer->  click next
Run the installer. Pokki window will appear, click next on it to start the installer.
                      The icons on the left hand side in the taskbar.
After the installing finishes you will find two icons on your taskbar-one of pokki and other of Instagrille.
Click on Instagrille for first time run. Click on the user profile icon located in the top right corner
                                        log in!
A login window for Instagram will appear. Login with your Instagram ID and password.
Congratulations! You just installed Instagram on your PC

4th Method... Webstagram
                               Webstagram
                                    Authentication
Login using your Instagram user ID and password. If you are already logged in then the application will ask for authorization.
Congratulations! You can now use Instagram on your PC.

Wednesday 16 October 2013

HOW TO REMOVE VIRUS THAT HIDE FOLDERS ON MEMORY CARD OR FLASHDRIVE WITHOUT ANTIVIRUS

Some of the virus makes the folders inside Flash Drives, Pen Drives, Memory Cards etc to Hide.
If your memory card properties showing there is Data inside and you can't see nothing inside..,,! Then use Command Prompt Commands to see them.
Here it is how it works.
  • Open Run (Win+R) and type cmd and press Enter
                          
  • Or open command prompt by going to your all programs===>accessories===>command prompt

  • A command Prompt will appear, type cd\ and hit enter.. This command will let the command applicable to Root directories and sub folders also.
                         
  • Not type I: and Enter {Note: Type your driver letter in the place of I. (example C, D, G,F.. etc} you can see this by going to your computer to view your drive letter


  • Type dir/ah and Enter. This Command useful to identify the directories effected by the viruses.
                                 
Now type attrib –h –s /s /d and hit Enter [attrib –h{space}-s{space}/s{space}/d]

After a few seconds you can see your driver letter again this means the process is completed
                                      
THEN YOU'LL GET ALL YOUR DATAS OR HIDDEN FOLDER BACK
                         .
Tip:
     This process is applicable not only for Pen Drive or Flash dives like External Hard Disc, but also applicable for your system drives also.

    After applying this command, some of the strange folders you have never seen may appear but don't worry, they are system related files, just hide them if you don't want or try delete if possible.


OR
open cmd
type i: (Your Drive Letter) and enter
type attrib -s -h /s /d *.* and press enter

Monday 14 October 2013

ABOUT YOUR NOKIA LUMIA 920


Nokia lumia 920 is one of Nokia most innovative smartphone,which is running windows  phone 8. lumia 920 is also one of the 4G LTE smartphone  enabling it to get 5 times more data connection speed than 3G.it can also be upgraded to amber  Among the features(AMBER) that are displayed in the video is the new on-screen clock that shows the time even when the phone is sleeping. Other parts of the Amber update will allow you to double tap the phone to wake it, flip the phone over to turn off the ringer and add new wallpaper options from SkyDrive. 

The update also adds a number of functional new features for your camera thanks to the Smart Camera app, which is part of the Amber update. Within the app you'll find things like Action Shot,which allows you to photograph a subject in motion and produce one photo tracking an entire sequence. The app will also let you change faces on a portrait until you find the best shot for everyone. Remember, the camera app is part of the update for Nokia models only.

In addition to the Nokia only parts of the update, there are a number of things coming in the GDR2 update, which is being sent out for all Windows Phone 8 users. This part of the new OS build includes an FM radio which is being enabled with the update, and the expansion of Datasense to more carriers. This application will help you track your monthly data usage, alert you to when the the next monthly billing cycle will start, and even tell you which of your apps are consuming the majority of your monthly data allowance
Note: The availability of this update may depend on your network service provider. To check for updates, on your phone, tap Settings > phone update.

FEW TIPS ABOUT YOUR WINDOWS PHONE

1.      Wireless charging  
Your phone will love a good energy boost every now and then – and you can now power up without plugging in. Simply lay your Lumia on a colourful charging plate or the new Fatboy Charging Pillow until you’re ready to go. Plate up in your kitchen, office, bedroom, or wherever – the more plates you have, the more places you can get a charge easily. Nokia Lumia 920 also supports USB and Qi compliant chargers -- just remember to always use a Nokia charger with your Lumia device for the best results.

Step your Nokia experience up a level with other handy add-ons. Listen in style with great speakers and headsets, including the Nokia Luna headset – pair it with our DT-900 wireless charging plate and boost the battery wherever’s convenient. To find out what extras could work best for you, ask your local Nokia retailer or operator.
                                                          Nokia Lumia 920

2.      Built-in Talk to Text
Holding the Windows button down accesses the speech recognition function and also the talk-to-text feature. If you are using a Bluetooth headset, the feature will allow the device to read messages to you via voice, and you reply, edit and send text messages using only your voice. It is a recommended feature for text and driving situations.

3.      Application Control
Hold the back button to zoom out and see app which are open, press the back button again and it will return you to the last opened app. Another back button press will close the app and tapping the back button a few more times will close all the apps.

4.      Stay Notified
If you want to be notified with how many missed phone calls, SMS, emails, battery level and more, go to Settings > Lock screen. Tap the apps to show quick status. Get the battery saver app, and it will display the battery level without unlocking the device.

5.      Unfreeze the Frozen Lumia
Nokia Lumia 920 can freeze up just like any other smartphones; if it does, hold the volume key, the unlock key and photo capturing key till the device vibrates. The Lumia 920 will restart itself to unfreeze.

6.      Lock screen customisation
Settings > Lock screen. Tap the background and you can auto change your lock screen with photos or Facebook or apps. These apps will display itself through the lock screen.

7.  Pin contacts to your Start Screen

If you want updated information from certain contacts, pin them on your Start Screen. Go to Contacts and long press then hit "pin to start screen". You can also pin virtually anything on the Start Screen, unique feature of the Windows Phone.

8.      Selecting mobile data speed
It is true that 4G network can have 5 times more speed than 3G, but the device using it suffers from heavy battery drain. If you are not using 4G, go to "Settings > Mobile Network > then select other network speed such as 2G or 3G to save battery.LTE on your network and device
Your new Lumia 920 comes with LTE capability. That means it’s ready to take advantage of the highest data speeds going as 4G/LTE networks are rolled out around the world. Check if your operator supports 4G/LTE for smartphones - if they do, you’re ready to enjoy the ride with your Lumia 920.When travelling outside of your home network, we recommend you simply switch your ‘Highest connection speed’ to 3G to avoid any issues with calls or text messages. You can change that in Settings by tapping ‘Cellular’ or ‘Mobile Network’.If your operator doesn’t support 4G/LTE for smartphones yet, you can use 3G instead. Thanks to technologies like the Snapdragon S4 processor and Windows Phone 8 in your Lumia, you’ll still enjoy speeds so fast that some networks identify themselves as 4G. So don’t be alarmed even if your phone says it’s on a 4G network -- it’s just using the fastest available data speed.

9.      Nokia City Lens
If Android has Google Maps, Nokia uses City Lens the unique real-time mapping experience. City Lens allows you to find nearby establishments visually. The app will turn to landscape orientation and lets you pick what you want to search, then it will open the camera app overlaying places with distance, displaying what's ahead of the user.

10.      Cinemagraph

It is a camera app which allows the user to create GIF files from captured movie clips. Cinemagraph simply needs something that is moving and the user can edit the clip. The user can isolated movements, change loop speed, and where the animation begins.also Your pictures and videos are more detailed, brighter and less blurry thanks to our clever PureView camera technology. The phone features Optical Image Stabilisation to eliminate shaky images and videos, plus a Carl Zeiss lens to make sure you get the best results every time – even in low light or at night.Lenses also gives you more ways to get great images from your Lumia 920. Take multiple shots with a single click using Nokia Smart Shoot, and make catching and editing your perfect picture a doddle. Create live pictures with Cinemagraph and really get things moving.Here’s a top tip to help you improve the performance of your phone. Make transferring videos off it quicker by keeping your filming short (good advice for budding directors all round, really…). When you’re uploading a video, we recommend using your SkyDrive to make accessing it from your laptop, PC or other devices even easier.

you can also click here jailbreak-side-load-lumia-device
click here to learn how to manually-install-windows-phone-7-8

TIPS ABOUT YOUR SAMSUNG GALAXY S4


Knowing hidden features about your Samsung galaxy s4 can help improve better functionality of your phone and your Samsung galaxy is a very nice smartphone with  the latest technology.  going to be giving you few tips about your Samsung galaxy s4

                         
Control the phone using Your Eyes

Establish eye control on your phone while you watch movies or browsing over the Internet. Go to "Settings > My device > Smart Screen > Check Smart Stay > Check Smart Pause and turn on Smart Scroll." Be reminded that this feature does not work with all applications.

Improve the Battery Life

No need to download other applications to boost battery on your Galaxy S4. Access the feature quickly by pulling the notifications panel using two fingers and turn on the power saving mode. Modify the aspects of the power saver by going to the settings of your phone.

Looking for Misplaced Galaxy S4

In case you have lost your Galaxy S4, download and install the Lookout Mobile application to help you track down the lost phone, provide sound alerts and know the last location signal. If the device is still lost, install the Plan B to track it down.

Improving Keyboard

The keyboard on your Galaxy S4 has a built-in Swiftkey which is very smart on learning how you type but some settings are hidden from you. Long press on the microphone to view keyboard settings, predictive text and link to your accounts or choose the right-most icon to resize the virtual keys or move it around the screen.

Home Button Speed Up

Voice application can be a useful tool if you want to access phone features quickly but disabling it can speed up the home button. Double tap the home button, select menu and pick the settings. Remove the check from "Open" via home key.

Checking Alerts Remotely

No need to touch the phone to check alerts by using the Quick Glance feature. Go to "Settings > My device > Motions and gestures > Air gesture > Quick glance." This will allow you to show notifications bar icons, missed calls, new messages, battery life and current time by simply moving your hand over the screen.

Dual Window

Multi-task on your phone by using the Dual Window mode on several applications such as YouTube, Twitter or Facebook. Check emails while reading notifications from Facebook or tweets from Twitter.

Quick Access to Common Settings

Open the notifications shade and long press on a toggle to bring you directly to the settings of that control.

Google Now Quick Launch

Google Now can be very useful to get information online and also learns on your habits to give efficient answers. To launch it quickly, press and hold the menu button on your Galaxy S4.
Easy Mode

For amateurs to avoid getting confused with the home screen and interface of the Galaxy S4, activate the Easy Mode to give a neat, simple UI and hides extra features which can be complex on the first day. You can switch it back anytime you are ready to learn more on your Galaxy S4

Photos with Voice Control

Use the voice command to control the phone's camera when you are not holding it. Open the camera application then go to "Menu > Settings > Voice Control." Now you can command the Galaxy S4 to capture photos on a stand.

Smart Alerts

Smart Alerts notify you by vibrating if there are any notifications requiring your attention once you picked the phone up from idle. Activate it by going to the "Settings > My device > Motions and gestures > Smart Alert."

Block Annoying Callers

A special incognito method allows you to block annoying callers or from unwanted numbers. Go to "Applications > Menu > Call settings > Call rejection."

Glove Mode

Although this is not exclusive in Galaxy S4, the Glove Mode option will allow you to navigate around the phone even with your gloves on. Go to "Settings > My device > Display > High touch sensitivity."

Air View Feature

Activate the Air View feature on the settings and use to access information on certain items you select by hovering your finger above them.

Data Traffic Control

Do not be afraid about exceeding your data budget with the Data Traffic Control on your Galaxy S4. Go to "Settings > Connections > Data Usage." In this way, you can setup the maximum and accurate reading of the current data usage on your phone.

Reveal All Toggles

Use two-finger swipe down action on the notifications bar to reveal all toggles for quick access. Toggles include volume control, screen brightness, S Beam, NFC, Smart Stay and Air Gesture. In addition, you can also edit some parts of the quick toggles according to your preference.

TV Remote Functionality

Samsung Galaxy S4 comes with an infrared port and WatchOn application to control TV sets using the smartphone. Use the built-in wizard to easy configure your Galaxy S4 to the TV unit and make as a universal remote.

Best Photo Feature

Inside the camera app, a "Best Photo" mode is available to burst 8 eights successively which chooses the best image. It is a very neat feature that eliminates the issues of closed eyes and determines the photo which turned out the best among the rest.
Lock Screen Customisation

The lock screen is customisable by default which allows you to edit widgets or change basic settings. Go to the "Settings > My device > Lock screen and then pick Options." You can also choose to see a clock or personal message.

Control Xbox 360 and USB Drives

Get an USB OTG cable and gain control over the Xbox 360 controller or access media files over USB thumb drives. Your Galaxy S4 can view files inside USB flash disk with the ability to copy, cut or delete them. This is good for backing up files from the internal and SD card to a USB flash disk.

Do Not Disturb

A "blocking mode" is available on your Galaxy S4 which acts as the "do not disturb" for Android OS. It blocks incoming calls, notifications, alarms and even the LED indicator to prevent disturbing you.

Headset Control

Your headset can control the music playback and calls without direct interaction with your phone. Hold the button to launch the S Voice so you can announce if any message or notifications are active and even direct calls on your command.

Motion Control

A set of sensors are inside the Galaxy S4 which allow advanced controlling and navigation such as Air Gestures. Gain access to them by going to "Settings > My device tab > Motions and gestures > Air gesture > Turn on."


Wednesday 9 October 2013

10 tips for a faster computer

Audio- and video-based computers thrive on speed, so who doesn't want a faster computer? But you might not need to buy a faster machine if you follow these tips. Most are for Windows XP, but also apply to Windows Vista™.

Turn off the programs that load into RAM on startup. Go Start > Run, type MSCONFIG in the "Open" field, then click on OK. Click on the Startup tab, and uncheck anything that's not essential. Do you really need "iTunes Helper"? Don't be afraid to uncheck functions, as Windows will open anything it really needs.

Optimize USB and FireWire external hard drives for performance. Go Start > Settings > Control Panel. Double-click on System, click on the Hardware tab, and click on Device Manager. Click on the + symbol next to Disk Drives, right-click on your external drive, and select Properties. Click on the Policies tab, and choose "Optimize for Performance" (Fig. 1) There is a tradeoff, though; to avoid potential data loss, use the "Safely Remove Hardware" option in the system tray (the button with the green arrow) when disconnecting the drive.

Optimize internal drives for performance. Follow the same steps as above, but right-click on an internal drive instead of an external one. Select Properties, click on the Policies tab, and choose "Enable Write Caching on the Disk."
                        Figure 1
Use ReadyBoost. This is the only tip that isn't free, but with Windows Vista you can insert a USB thumb drive (up to 4GB) and when you do, you'll be prompted as to whether you want to enable ReadyBoost (Fig. 2). This adds more memory to your system; it isn't the same as adding more system RAM, but is more like having a really good disk cache. The improvement in speed is noticeable for just about anything other than continuous streaming of data. You do need a fast USB drive; if it isn't fast enough, Windows Vista will notify you that it's not suitable.
              Figure 2
Be careful about automatic updates. Windows Automatic Update is worth leaving on, as security patches for Internet Explorer are relatively frequent. But some automatic updates essentially take over your computer while they do their job, which can interfere with your work. Most automatic updates have an option where you can ask to be notified of updates, which lets you decide whether to install them immediately or wait. Another option is to schedule updates for when you're not using your computer.

For your audio interface, use ASIO instead of MME or WDM drivers with Sony Creative Software applications. Most interfaces have drivers for all three, but MME and WDM are much slower. And never use any driver that's "emulated."

With ASIO, give priority to Background Services. Sony's programs support the low-latency ASIO protocol, but for best results, go Start > Settings > Control Panel. Double-click on System, click on the Advanced tab, and under Performance, click on Settings (Fig. 3). When the Performance Options window opens, click on the Advanced tab and for Processor Scheduling, choose "Background Services."
                               Figure 3
Check periodically for new drivers for hardware. New drivers often result in better performance. And don't forget your graphics card; graphics performance often affects audio.

Defragment your drives periodically. This isn't as important as it once was, but a really fragmented drive can slow things down.

Don't disable System Restore. Some people claim disabling System Restore improves performance, but it's worth taking the teeny (if any) performance hit in exchange for being able to return to a restore point when needed.

TOP 10 UNKNOWN GOOGLE TIPS


Below is a list of our top ten Google tricks many people who use Google don't know about.

Definitions
Pull up the definition of the word by typing define followed by the word you want the definition for. For example, typing: define bravura would display the definition of that word.
Local search
Visit Google Local enter the area you want to search and the keyword of the place you want to find. For example, typing: restaurant at the above link would display local restaurants.
Phone number lookup
Enter a full phone number with area code to display the name and address associated with that phone number.
Find weather and movies
Type "weather" or "movies" followed by a zip code or city and state to display current weather conditions or movie theaters in your area. For example, typing weather 84101 gives you the current weather conditions for Salt Lake City, UT and the next four days. Typing movies 84101 would give you a link for show times for movies in that area.
Track airline flight and packages
Enter the airline and flight number to display the status of an airline flight and it's arrival time. For example, type: delta 123 to display this flight information if available.
Google can also give a direct link to package tracking information if you enter a UPS, FedEx or USPS tracking number.
Translate
Translate text, a full web page, or search by using the Google Language Tools.
Pages linked to you
See what other web pages are linking to your website or blog by typing link: followed by your URL. For example, typing link:http://www.computerhope.com displays all pages linking to Computer Hope.
Find PDF results only
Add fileType: to your search to display results that only match a certain file type. For example, if you wanted to display PDF results only type: "dell xps" fileType:pdf -- this is a great way to find online manuals.
Calculator
Use the Google Search engine as a calculator by typing a math problem in the search. For example, typing: 100 + 200 would display results as 300.
Stocks
Quickly get to a stock quote price, chart, and related links by typing the stock symbol in Google. For example, typing: msft will display the stock information for Microsoft

COMPUTER DICTIONARY

You want to know the meaning of some computer words, CLICK HERE  

CD/DVD or Disk Problems? How to Fix Problems Caused by Filters

Filter drivers (simply called "filters") are device driver "add-on" parts (they're like "plug-ins" for drivers)
> Filters are intended to work with and augment device driver functionality
> Filters intercept (and can alter) the I/O data stream between a Windows application and a hardware device

A filter may come from Microsoft or get installed by a 3rd party product. Examples: Disk backup and CD/DVD burning products sometimes install filters to help support their functionality
3rd party filters
Don't always work well with existing device drivers and hardware
Don't always work well with other 3rd party filters
Plus
> Filters sometimes get corrupted
> Filters sometimes don't get removed correctly when the product that installed it is uninstalled
As a result:
Corrupt or missing filter files may interfere with device driver functionality
Bad filters may be the underlying cause of a driver error code
Bad filters may result in strange/faulty device behavior
Symptoms
Fact is, most people aren't aware of filters so they're easily over-looked as a problem source. Possible symptoms of filter related problems include:
Devices (such as disks and CD/DVDs) that appear in Device Manager but not in My Computer or Explorer
Computer can't detect a CD/DVD or can't write to writable media
USB devices (such as iPods and Disks) that don't seem to get detected
> Note there are still many other reasons for undetected USB devices
> So try fixing filters but don't get hung up on filters as "must be" the cause
A persistent driver error code equal to: 10, 19, 31, 32 or 39
> To see the error code in Device Manager, rt click the device and look on the General tab

How to Fix Filter Problems
The steps below include automated tools some of which will check for and try to fix more then just filters. So try each approach listed below for your OS

Some important things to note:
Reboot after each step before you re-test
After removing filters, you may need to reinstall 3rd party disk and CD/DVD products if they no longer function correctly
> The instructions below may remove all your 3rd party filters
> Removing all filters can remove a faulty filter and fix your problem BUT
> Removing all filters may also remove a filter still needed by a disk or CD/DVD product to work correctly
> If you find a disk or CD/DVD product not working after removing filters, uninstall then reinstall the product

How to Manually Remove Filters from the Registry
This method explains how to look for and delete UpperFilters and LowerFilters in the registry. Note
> Use this method to find registry data for class=CDROM or class= DiskDrive
> Choose the class based on whether it's CD/DVDs or disks with the problem
> If you see subkeys named: UpperFilters or LowerFilters, rt click to delete them (example below)
Create a System Restore point before you proceed!! (so you have one just in case you should need it)
> For XP:
Step 1: Click on Start, All Programs, Accessories, System Tools, and click on System Restore.
Step 2: Click on the Create a restore point radio button and then click Next.
create system restore point
Step 3: Now give your restore point a description so that you know exactly what you installed afterwards, i.e. “Before installing driver”, etc.
> For Vista and Windows 7: Create a Restore Point for Windows 7 or Vista’s System Restore
Open up the Start Menu and right-click on “Computer”, and then select “Properties”.
This will take you into the System area of Control Panel. Click on the “System Protection”.
Now select the “System Protection” tab to get to the System Restore section.
Click the “Create” button to create a new restore point. You’ll be prompted for a name, and you might want to give it a useful name that you’ll be able to easily identify later.
Click the Create button, and then the system will create the restore point.
When it’s all finished, you’ll get a message saying it’s completed successfully.
Now if your application blows up Windows, you can restore your computer using System Restore.

How to navigate to your registry
Click your menu then locate your run command then in your Run command box type Regedit to take you to your Registry Editor
then click on your HKEY_LOCAL_MACHINE\SYSTEM\CurrentControlSet\Control\Class\{4D36E965-E325-11CE-BFC1-08002BE10318}
                        [IMG]
[*]If you see subkeys named: UpperFilters or LowerFilters, rt click to delete them
==> If you don't see the subkeys, then no filters exist
[*]Exit the Registry Editor and reboot

Friday 4 October 2013

COMPUTER TIPS/TRICKS

General Tricks


Windows hidden "god mode" folder Windows offers a centralized Control Panel for all of the OS settings, which makes it easy for users to tweak everything from desktop background to setting up a VPN. To enter this mode, create a new folder with this exact name (copy and paste it): God Mode.{ED7BA470-8E54-465E-825C-99712043E01C}. The folder icon will change to a Control Panel-style icon, and you will be able to jump in and change all kinds of settings. Note: Don't try this on Windows Vista 64-bit as it's known to cause a reboot loop

Use Problem Steps Recorder This handy tool automatically records any mouse clicks and takes screenshots for you. If you need tech assistance with your computer, go to Run by typing Windows + R, and then type "psr." Use the tool and by the time you are finished, you can send this information, neatly compiled automatically, to the person helping you with the issue. It will make the process of finding the problem much easier for them, which means you will be able to get your system up and running faster.

Find/Delete large files wasting space A handy tool called WinDirStat (Windows Directory Statistics) can be used to easily find which files and folders are taking up the most space on your drive. From there, you can delete them and open up a ton of storage space.


Reduce the number of programs running at startup If your PC is taking too long to boot, it’s probably because you have far too many programs running at startup. Reducing this is easy, it will make your PC launch noticeably faster and lighter upon first load. To change the items running at startup, go to Run using the hotkey Windows key + R, and type "msconfig." A small window will appear (see the screenshot below), select the Startup tab. From here you will be able to turn off many startup programs, which can shave several seconds (or minutes) off your boot time. (Note Windows 8 has moved this functionality to the Task Manager). Try to make sure you research what you are turning off as some processes might be needed by third party programs or drivers you have installed.


Typing Tricks

Delete an entire word Instead of deleting a single letter, pressing CTRL + BKSP will delete the entire word behind the cursor. This makes deleting text quicker if you screw up a whole word.

Move Cursor to beginning of the next or previous word Moving the cursor around manually while typing is a great way to make your work take longer than it needs to. To speed of the process, move the cursor around with keyboard shortcuts. To move it to the beginning of the previous word, use CTRL + Left Arrow. To move it to the beginning of the next word, use CTRL + Right Arrow. In OS X you can accomplish the same using the Option key.

Making sub and superscript text If you need to make sub or superscript text (think exponents for superscript), press CTRL + = for subscript and CTRL + SHIFT + = for superscript.

Paste plain text of what was copied When you copy text from any source, programs will usually copy any formatting that comes with it. To paste this as plain text, press CTRL + Shift + V instead of the standard CTRL + V, and the system will paste unformatted text. 
Note that many programs follow this parameter (Chrome, Firefox, etc.) but not all, particularly Microsoft programs like Word or Outlook. For those there's a few alternatives that go beyond copying and pasting in Notepad: 1) CTRL + ALT + V will show a 'paste special' dialog box. 2) CTRL + Spacebar will remove formatting in already pasted text. 

Keyboard Shortcuts

Copy only active window to clipboard Normally, the Print Screen key copies the entire display (or two displays if you got them), ALT + Print Screen only copies the currently active window to the clipboard. Whether taking a screenshot to diagnose a problem, or just because you want to show something to a friend, this will come in handy.

Fix those little mistakes Did you know you can undo almost any action? CTRL + Z is the ultimate hot key, and for sure you knew about it already, however note that undo doesn’t just apply to typing. If you accidentally delete or move a file, you can hit CTRL + Z to bring it right back to where it was. In Chrome and Firefox you can also undo closing a tab using CTRL + SHIFT + T.

Cycle through open windows Pressing ALT+TAB allows you to cycle through currently open windows. This makes switching back and forth between running processes quick and painless. If you want a more stylish method of cycling through open programs, Windows + TAB will do the job for you.

Interrupt all processes CTRL + ALT + Delete is one of the most common PC shortcuts, and one almost everyone is familiar with. The important thing to note is that it interrupts all processes, including the one that is bogging down your system, which can mean the difference between needing to restart or not.

                 
Close the current program Typing ALT + F4 will close the program that is running. This is useful as it saves you time mousing over the "X" and clicking. People will often use this as a joke, telling you to press ALT + F4 to fix a problem. Don’t fall for it unless you want to close what you are doing.

Minimize all windows Sometimes you have a bunch of stuff running, and you want it all to go away so you can get to the desktop. Simply pressing Windows + D will minimize everything you have up, which will save you some time pressing the minimize button for each window. It should be noted that Windows + M offers similar functionality, but there is no undoing, so Windows + D is the more favourable approach.

Open the task manager directly If you want to bypass the interrupt that happens when pressing CTRL + ALT + DEL and jump right to the task manager, typing CTRL + Shift + ESC launches it directly.

Close the current window/tab Stick of moving all the way to that X button? Press CTRL + W and the current window will close. (Don’t do it now, or you will miss the rest of the tricks!)

Bring up the system information window This is so much quicker than digging this out the traditional way... Just press Windows + Pause/Break and the System Information panel will be ready to go. This might be the only use for the Pause/Break key you will ever find, so enjoy it!


Wednesday 2 October 2013

EASY WAY TO RESET ALL HUAWEI NEW ALGO USB MODEMS WITH UNLOCK COUNTER AFTER EXCEEDING 10 UNLOCK ATEMPTS

Here is How You Can Reset Your New Huawei Datacard using Hash Reset Calculator and and DC unlocker

Would you want to reset your huawei e33s, e303d, e3o3u, e303c, e173, e356, e367, e353, e3131, k3772 etc blocked unlock attempts?

If you have exceeded and exhausted your huawei modem unlock counter attempts either for your old or new algo based modems? and would want to reset from the 0 unlocking attempts to the default 10 unlocking attempt for free. You�re going to need to follow these steps herein

Things you will need

1. Huawei Hash Reset Code Generator Free
2. Dc-Unlocker Free

Step 1

Request for your new and old algo hash reset code from free huawei new hash reset code generator.

From the hash reset code counter request page, you will find new algo hash reset, old algo hash reset and flash code. The hash rest code is about 34 digits comprising of both alphabets and letters. This you will get after entering modem model and imei number.

Step 2

Open your already downloaded DC unlocker. Select huawei datacards, click search. Dc unlocker will automatically search for your modem and detects its COM port.
Underneath the last line of your modem unlock info while in DC unlocker environment, enter your new or old hash algo reset code you have generated from step 1 above. Like this AT^CARDUNLOCK=New / Old Hash Reset Code e.g AT^CARDLOCK= 57bc817cf69404d564dc42e82d662c40â
hash reset dcunlocker Automatically, your modem unlock counter becomes reset to zero. You can then request for your new algo code here and have your modem unlocker permanently